Course Overview
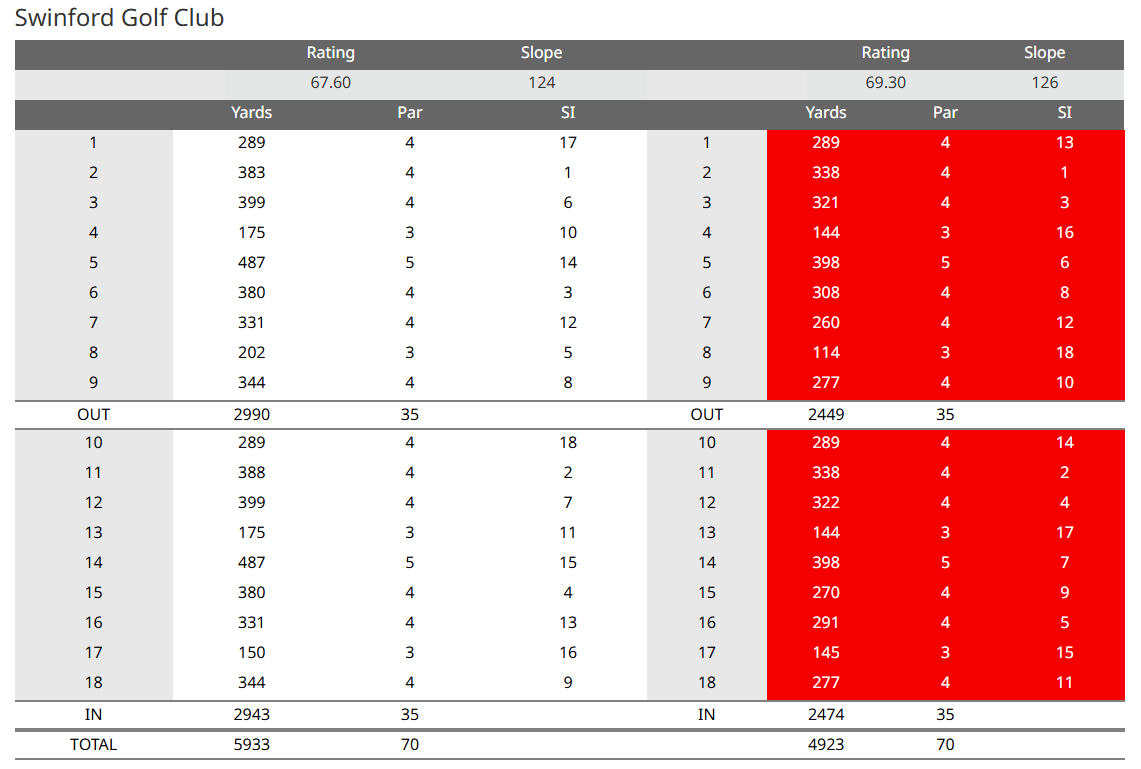
A parkland course set in an old parkland estate and measuring just 5690 yards, Swinford is not very long but it demands lots of different types of shots.
There are a good mixture of holes including driveable par 4’s, small and large greens, blind second shots, severely sloping greens, out of bounds in play off the tee on 5 of the holes. While many try to overpower the course with the driver, the course can bite back.
Accuracy and course management is the key to scoring well around Swinford.
Hole By Hole

HOLE 1 - THE WARM-UP
A short 297-yard par 4 to ease into the round. A well-placed driver or long iron off the tee sets up a short iron approach to a generous green. Downwind, the big hitters can take on the green in one.
PRO TIP
A great birdie opportunity—but don’t get too aggressive early in the round.
HOLE 2 - THE HEARTBREAKER
An up-hill par 4 which is the signature hole of the course. From an elevated tee, the drive is demanding, with out-of-bounds right and trees left, narrowing the fairway. A solid tee shot leaves a mid-iron into a narrow, sloping green, well-guarded by bunkers short and right. Anything left leaves an almost impossible up-and-down.
PRO TIP
A bogey 5 is never a bad score here—par feels like a birdie!

HOLE 3 - THE TREE FINDER
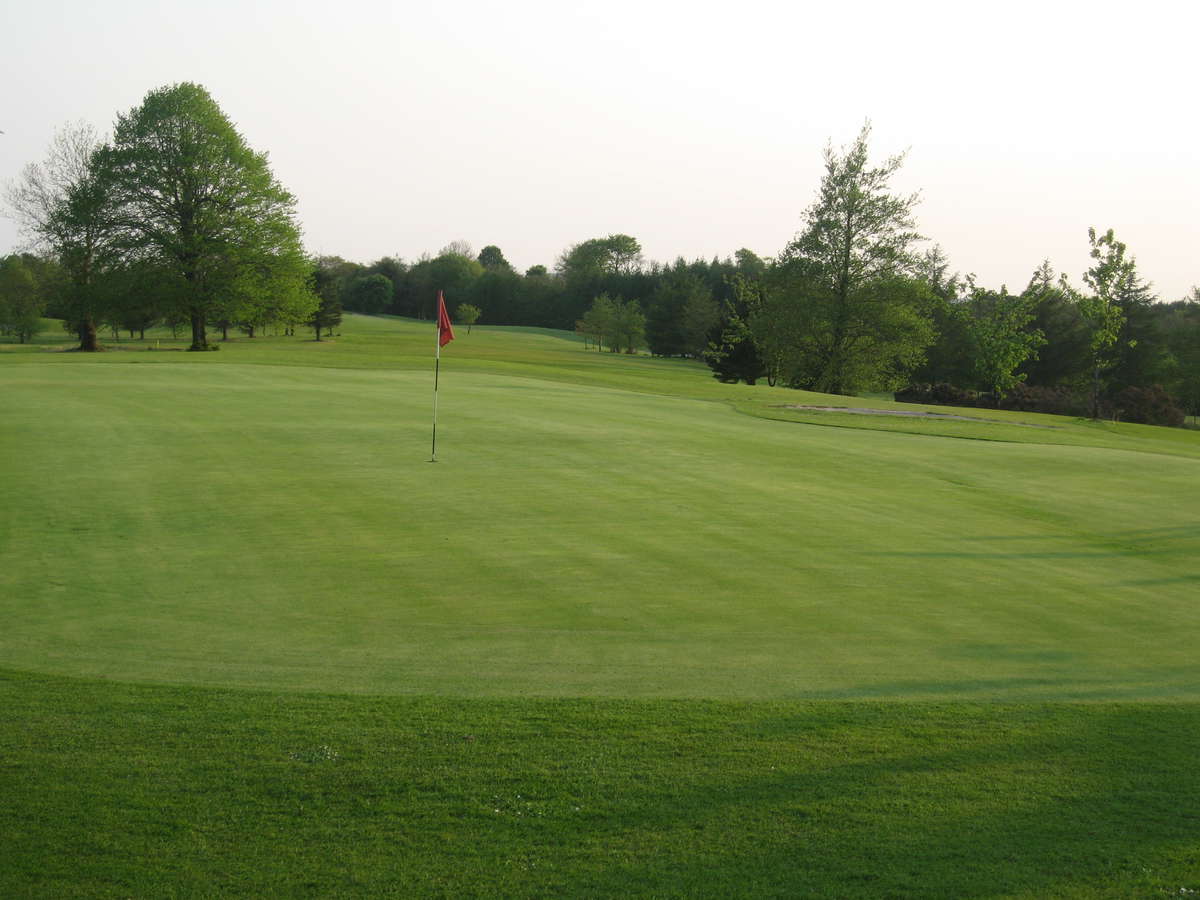
A slight dogleg left to right par 4 where accuracy off the tee is key. The right-to-left sloping fairway pulls stray drives into the trees left, while the right side is also lined with trees. A mid-iron approach is needed to find a long, narrow green, with a subtle ridge running down the center. Miss left, and you’ll face a tricky uphill chip.
PRO TIP
If in doubt, aim right of the green—it’s the safest bailout.
HOLE 4 - THE GREEN MIRAGE
The first of the par 3s, playing 175 yards and demanding respect. The shallow green is difficult to hold, with two deep bunkers front and left. Go long, and you’ll face a severe drop-off behind the green, leaving a tough recovery shot.
PRO TIP
If you hit the green, pay close attention to the subtle breaks on your putt.

HOLE 5 - THE TEMPTATION
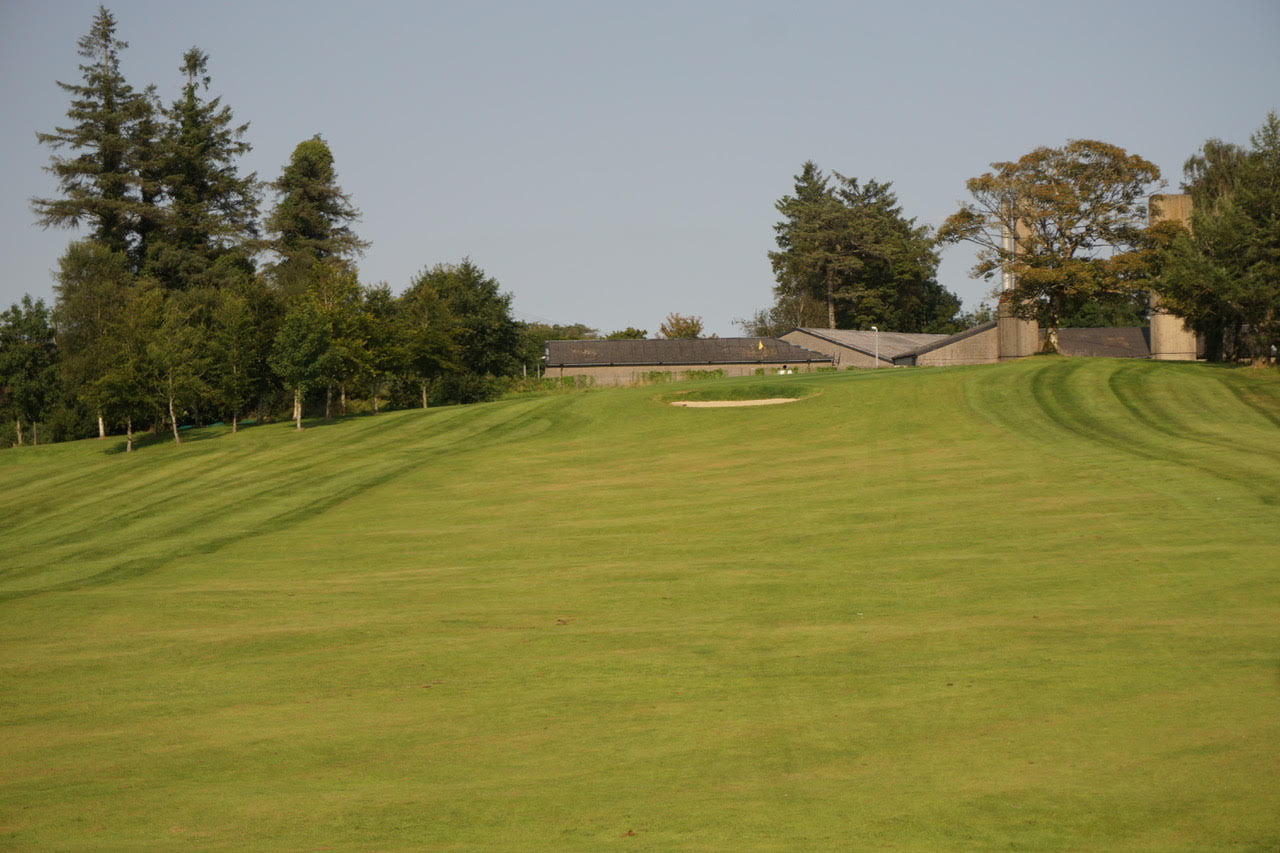
A short par 5 with out-of-bounds all the way right from tee to green. A good drive sets up a chance for big hitters to reach in two. The elevated green slopes back to front, with a bunker guarding the front to catch anything short.
PRO TIP
Keep your approach below the flag—it sets up a real birdie opportunity.
HOLE 6 - THE O.B. EXPRESS
A dogleg left to right par 4, where avoiding out-of-bounds right is crucial. A tee shot to the wide fairway sets up a mid-to-short iron approach to a bowl-shaped green that can be very receptive to the right shot.
PRO TIP
Don’t come up short of the green—commit to the approach for a good birdie chance.


HOLE 7 - THE ILLUSIONIST
A slight dogleg right to left par 4, where wind plays a big role. Play an iron off the tee for position, or if the wind is favorable, big hitters can go for the green. Laying up leaves a blind wedge into a severely sloping green with a tiny landing area. Spin control is key—over-spin and you’ll face a long uphill two-putt. Going long brings out-of-bounds into play.
PRO TIP
Watch for tricky pin positions—a poor approach leaves a very tough putt.
HOLE 8 - THE LONG HAUL
Teeing off from an elevated tee, this 202-yard par 3 often requires a fairway wood to reach a back-to-front sloping green. A hidden drain runs across the front of the green, ready to catch anything short.
PRO TIP
Keep your tee shot below the hole to avoid a difficult downhill putt.


HOLE 9 - THE GAMBLE
A short par 4 with two distinct options:
- Take an iron off the tee for position, leaving a blind second shot.
- Or take driver, try to carry the hill at the narrowest part, and leave yourself a short wedge in.
The green slopes front to back, with bunkers on three sides making accuracy essential.
PRO TIP
Anything left, right, or long of the pin will leave a very tricky putt—approach with precision.
